Sioux Falls Special: Full brake job from $320/axle (pads + rotors) Get Quote

How to Tell If Your Brake Pads Are Worn - The Complete Diagnostic Guide

Your brakes are the most critical safety system in your vehicle. Worn brake pads not only reduce stopping power but can lead to costly rotor damage if ignored. This comprehensive guide will teach you how to identify worn brake pads through visual inspection, auditory cues, and driving symptoms. Learn when replacement becomes urgent and how to maximize the lifespan of your brake components.

  • 7 unmistakable signs of brake pad wear
  • Step-by-step visual inspection guide
  • Understanding different wear patterns and their causes
  • When to replace vs. when to seek immediate repair

The 7 Warning Signs of Worn Brake Pads

Brake pads typically last between 30,000-70,000 miles, but driving habits and environmental factors can significantly impact their lifespan. These are the most common indicators that your brake pads are reaching the end of their service life and require attention:

1

High-Pitched Squealing or Screeching

Most modern brake pads contain wear indicator tabs - small metal shims designed to contact the rotor when pad material wears down to about 20% remaining (approximately 3mm). This creates a distinctive high-pitched metallic squeal that's most noticeable during light braking. The sound typically disappears under heavy braking when the pads are pressed more firmly against the rotor.

Diagram showing brake wear indicator tab contacting rotor
Note: Some temporary squealing after rain or car washing is normal as surface rust clears from rotors.
2

Grinding Metal-on-Metal Sound

If you hear a harsh grinding or growling noise during braking, this indicates the brake pad material has completely worn away, allowing the steel backing plate to contact the rotor. This is an emergency situation that requires immediate attention, as metal-to-metal contact rapidly destroys rotors. You may also feel strong vibration through the brake pedal in this condition.

Illustration of metal backing plate contacting brake rotor
Warning: Continuing to drive with metal-on-metal brakes can turn a $200 pad replacement into a $600+ rotor and caliper repair.
3

Increased Stopping Distance

As brake pads wear, their ability to generate friction decreases. You may notice your vehicle takes longer to stop or requires more pedal pressure to achieve normal braking performance. This is particularly noticeable when braking from highway speeds or when carrying heavy loads. Worn pads also reduce wet-weather braking performance significantly.

Comparison diagram showing increased stopping distances with worn pads
Test: In a safe area, try braking from 30 mph - if stopping distance seems longer than normal, have your brakes inspected.
4

Vibration or Pulsation When Braking

If you feel shaking in the steering wheel or brake pedal during braking, this often indicates uneven pad deposits on the rotors or warped rotors caused by excessive heat. This frequently occurs when worn pads are left too long, as thinner pads overheat more easily. The vibration may start subtly and worsen over time.

Illustration showing warped rotor causing vibration
Common Cause: Aggressive braking while towing or carrying heavy loads accelerates this wear pattern.
5

Visible Pad Thickness Reduction

Through your wheel spokes, you can often see the brake pad pressed against the rotor. New pads typically have 10-12mm of friction material. Replacement is recommended at 3mm, and urgent at 2mm. Many pads have wear grooves that disappear when the pad is worn beyond safe limits, serving as a visual indicator.

Photo showing how to measure brake pad thickness through wheel
Tip: Compare to a new pad photo online if unsure - thickness can be deceptive at certain angles.
6

Brake Warning Light Illumination

Many modern vehicles have electronic brake wear sensors that complete a circuit when pads wear down to a predetermined thickness. When this circuit makes contact, it triggers a dashboard warning light (often yellow or red). Some luxury vehicles even display remaining pad life in the instrument cluster.

Dashboard warning lights including brake wear indicator
Note: Some vehicles use the same light for pad wear and low brake fluid - check both if light appears.
7

Uneven Pad Wear Patterns

If one pad in a caliper is significantly more worn than its counterpart, this indicates a mechanical issue requiring attention. Common causes include sticking caliper slides, seized pistons, or improper lubrication. Uneven wear reduces braking efficiency and can cause pulling to one side during braking.

Comparison of evenly worn vs unevenly worn brake pads
Important: Always replace pads in axle sets (both front or both rear) even if only one side appears worn.

Comprehensive Brake Pad Inspection Guide

While listening for warning sounds is helpful, visual inspection provides the most accurate assessment of remaining pad life. Follow this detailed process to properly evaluate your brake pad condition:

1

Prepare Your Vehicle

Park on level ground and set the parking brake. Allow at least 30 minutes for brakes to cool if you've recently driven. Chock wheels opposite the one you're inspecting for added safety. Gather a flashlight, ruler or tread depth gauge, and optionally a mirror for hard-to-see areas.

2

Locate the Brake Components

Look through your wheel spokes to identify the brake caliper (metal clamp-like device) surrounding the rotor (large metal disc). The brake pads are housed within the caliper assembly, pressed against both sides of the rotor when braking. Note that some vehicles have drum brakes on rear wheels, requiring different inspection methods.

3

Assess Outer Pad Condition

Identify the outer brake pad (usually visible without removing the wheel). Check both thickness and condition of the friction material. Look for:
- Cracks or chunks missing from pad surface
- Glazing (shiny, hardened surface)
- Uneven wear patterns (thicker at one end)
- Pad material separating from backing plate

4

Check Inner Pad Thickness

The inner pad often wears faster but is harder to see. Use a mirror or phone camera to view it between the caliper and rotor. Some vehicles have inspection holes in the caliper for this purpose. Compare inner and outer pad thickness - more than 2mm difference indicates potential problems.

5

Measure Remaining Material

Using a ruler or tread depth gauge, measure from the metal backing plate to the outer surface of the friction material. Replacement is recommended at:
- 3mm for standard organic or semi-metallic pads
- 2mm for performance or ceramic pads
- Immediately if any metal backing is visible

6

Inspect Associated Components

While checking pads, examine:
- Rotor surface for deep grooves or scoring
- Brake fluid level in master cylinder
- Caliper for leaks or damage
- Brake lines for cracks or bulges
- Dust boots for tears or deterioration

Professional Inspection Tip

For the most accurate assessment, have a technician remove wheels to inspect all pads completely. Many shops offer free brake inspections that include measuring pad thickness with specialized tools and evaluating rotor condition. This also allows inspection of caliper slide pins and hardware that can't be seen with wheels on.

Brake Pad Replacement Guidelines

Understanding when to replace brake pads involves more than just measuring thickness. These comprehensive guidelines will help you make informed decisions about your braking system maintenance:

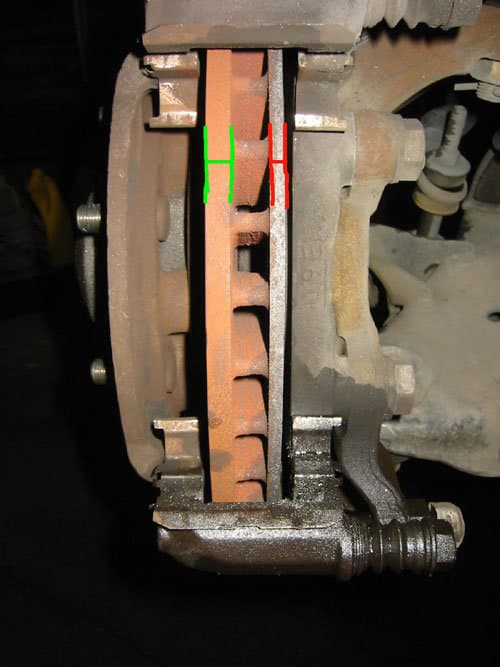
Understanding Wear Limits

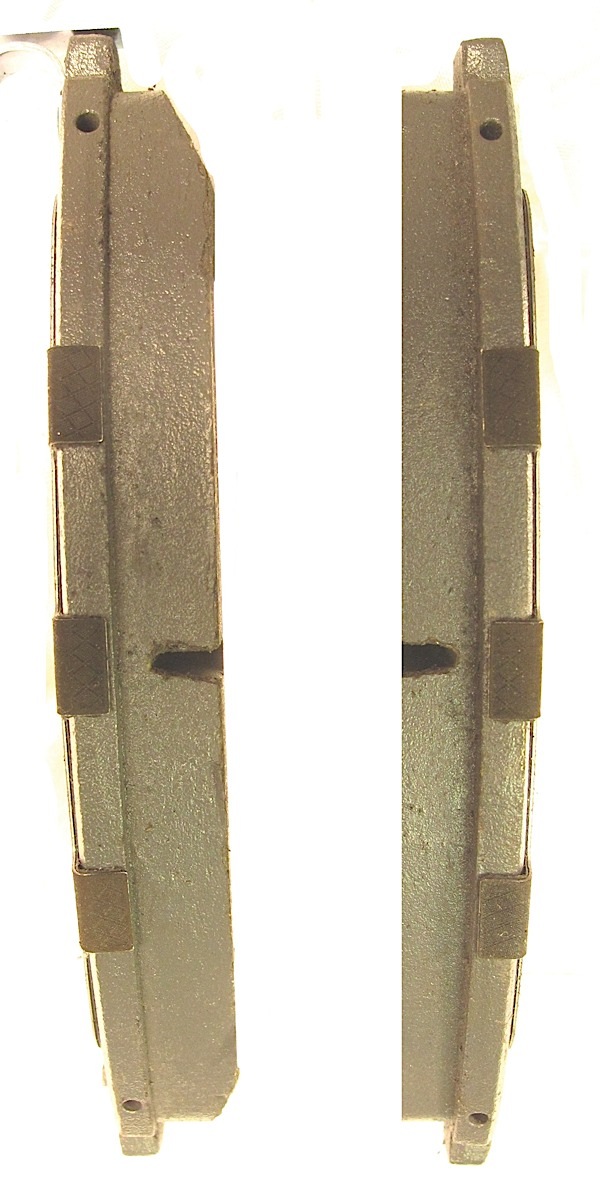
Brake pads typically consist of several layers:
- Friction material (10-12mm when new)
- Adhesive layer
- Backing plate (steel)
- Some include shims or wear indicators

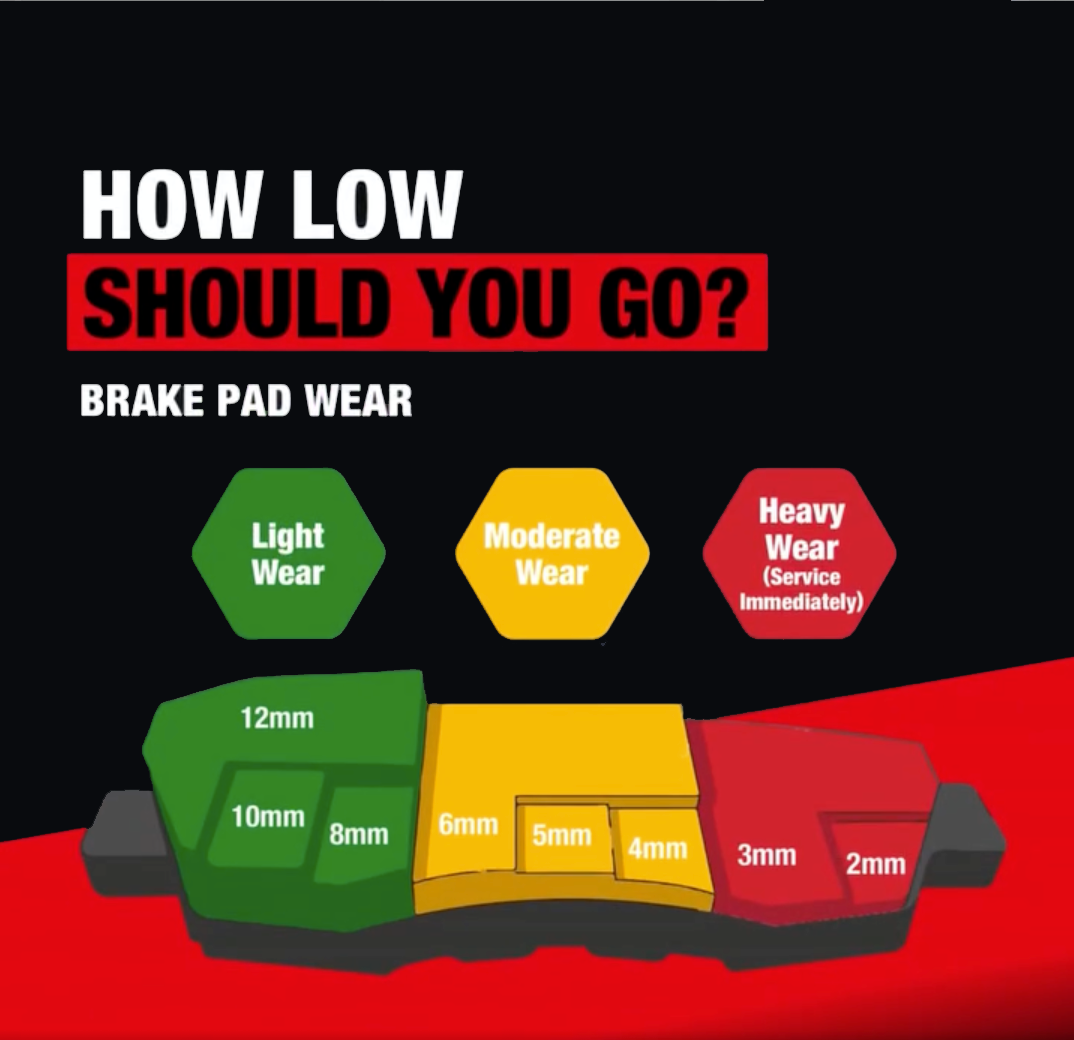
The minimum safe thickness before metal-to-metal contact occurs depends on pad design, but general guidelines are:

New: 10-12mm (excellent stopping power)
Good: 6-8mm (normal wear range)
Monitor: 4-5mm (schedule future replacement)
Replace Soon: 3mm (wear indicators may contact)
Replace Now: 2mm (urgent - risk of rotor damage)
Dangerous: 1mm (metal contact imminent)

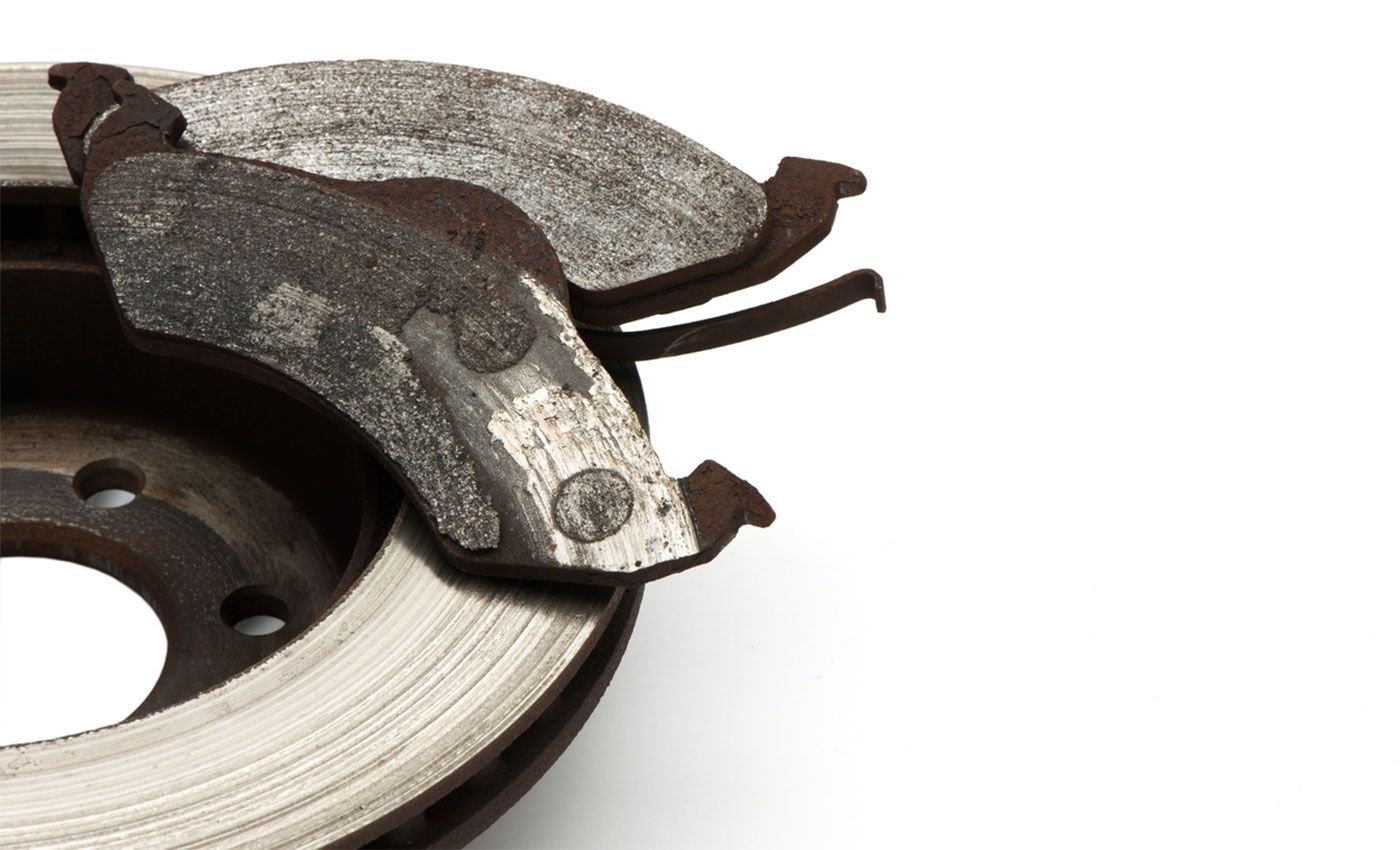
Factors Affecting Brake Pad Lifespan

While manufacturers provide general mileage estimates, actual pad life varies dramatically based on:

  • Driving Style: Aggressive drivers may wear pads 2-3x faster than conservative drivers. Frequent hard braking generates excessive heat that breaks down friction material.
  • Environment: City driving with constant stop-and-go traffic wears pads much faster than highway cruising. Mountainous terrain also increases brake usage.
  • Vehicle Weight: Heavy SUVs and trucks wear pads faster than compact cars due to increased momentum requiring more braking force.
  • Pad Material: Organic pads wear fastest but are quiet. Ceramic lasts longer but costs more. Semi-metallic offers a balance but generates more dust.
  • Passenger/Cargo Load: Regularly carrying heavy loads or multiple passengers accelerates wear.
  • Weather Conditions: Frequent driving in rain or snow can reduce pad life due to moisture exposure and road debris.
Detailed diagram showing brake pad composition and wear stages
Cross-section showing how brake pads wear down over time, with critical thickness indicators marked.

Critical Warning Signs Requiring Immediate Attention

If you experience any of these symptoms, stop driving and have your vehicle towed to a repair facility:

  • Complete brake failure (pedal goes to floor with little resistance)
  • Severe pulling to one side during braking (indicates hydraulic failure or seized caliper)
  • Brake fluid leaks (puddles under vehicle or low fluid level)
  • Burning smell from wheels (seized caliper or overheated brakes)
  • Total loss of braking in one circuit (dual-circuit systems will still have partial function)

Brake Maintenance Best Practices

Extend the life of your brake pads and prevent premature wear with these professional recommendations:

Seasonal Inspection

Have brakes checked before winter and after snow season. Road salt accelerates corrosion of brake components.

Proper Lubrication

Caliper slide pins should be lubricated during pad replacement to prevent uneven wear.

Fluid Replacement

Replace brake fluid every 2-3 years to prevent moisture contamination that causes corrosion.

Driving Technique

Use engine braking on hills and anticipate stops to reduce brake system workload.